What is collage?
Collage is a form of art where various materials are assembled into a new whole. Pablo Picasso, around 1910, was one of the first, if not the first artist to explore collage. This art form allows for a wide range of materials, but commonly, pieces of paper or fabric are adhered to a surface.
If you find drawing challenging, collage is a unique way to incorporate realism and surrealism into your art. I frequently use collage in my art journaling as a method to push my creativity further.
Although it might seem simple as just cutting and pasting images, collage involves so much more. This guide aims to help with some of those details and get you on your way.
Where to find elements for collage
Materials for collage can be found nearly anywhere.
Library Sales
Library sales offer an excellent source for quality collage materials. If you’re fortunate enough to have local library that holds sales like this you, can find tons of books with colorful photos and unique illustrations at a low cost.
Libraries receive donations of various printed materials, making these sales a treasure trove for collage artists.

Garage, Estate, and Yard Sales, Flea Markets, and Swap Meets
Garage sales, estate sales, and flea markets are also prime spots for finding materials at a low cost, including free magazines. Online marketplaces like Facebook Marketplace and eBay are excellent for locating vintage magazines, while Etsy provides a selection of pre-made collage sheets from artists.
Packaging
Packaging from products can offer interesting graphics and sturdy papers suitable for collage.
A big way that companies compete for customers these days is with their packaging. Marketing materials have great lettering and graphics, and some even use really good, sturdy papers.
Some of my favorite collage papers were once branded paper bags or papers that were used to wrap an item.

Craig's List, Facebook Marketplace, Ebay...
Facebook Marketplace and Ebay are great places to find vintage magazines. If you have a theme you like to work with like music, people and faces, houses, flowers, a certain era, etc., it’s easy to find larger lots of similarly bundled magazines. Even better if you can find the lots offering local pickup, and save on shipping!
Likewise, Craig’s List is a good place to find things for free that people just want picked up and out of their house or garage.
Etsy and Other Artists
If you don’t feel like searching through books and magazines there are plenty of artists who make and sell pre-made collage pages from images they have either created, or stock photos that they have compiled into sheets.
You can shop and find almost any theme you want through Etsy sellers, or direct from artist web sites.
NOTE: it is not OK to print artists works and use them for your own without purchasing, unless otherwise stated by the artist. Remember, it’s crucial to respect copyright laws and not use artist’s works without permission. Even items from your recycling bin can become valuable collage elements, such as sturdy food packaging. For those who prefer creating custom pieces, digital tools allow for the manipulation of scanned collages for a fresh look.
Your own Trash
I know. That sounds gross. But hear me out…
Some food boxes (like cereals and crackers) are a nice heavy weight option to either collage on, or to become parts of pages onto which you glue collage.
If you progress from collaging alone, to building your own junk journals (like I teach) you will be glad you collected some of these heavier pieces.
Make Your Own
Obvious, right? But I’m not talking about just taking or drawing your own pictures and cutting them out to glue somewhere else, but that is totally a source of collage!
Once you get some collage done scan it into your computer and cut out and reassemble portions for a new look. You may also want to scan other things you’ve made like paintings, sewn pieces, photo albums.
Start looking at things around you differently. Anything can be photographed and used for collage.
Craft Stores
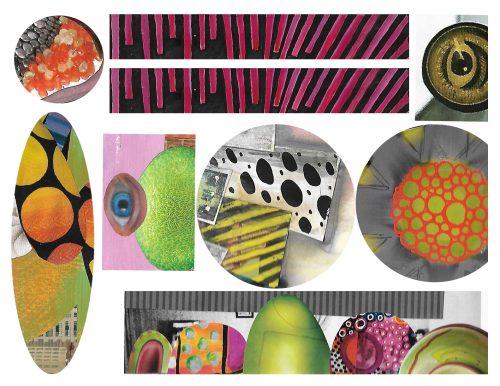
Craft stores are filled with decorative papers and scrapbooking supplies. When choosing colors for collage, vibrant pieces are attractive, but don’t overlook the potential of monochromatic schemes. The texture and background of materials can add depth to your work, encouraging a different perspective on ordinary images.
Best Colors to Use in Collage:
The most obvious choice is to start out a collage piece with very colorful pieces of paper or fabric. After all, we see our world in color.
But, think differently, too! I’ve seen some really amazing pieces made of black, white, and gray, or other monochromatic color schemes.
Of course there is no right or wrong choice. I encourage you to collect a variety of images, and lettering/words, that you like.
Also, you don’t have to only work with images or decorative lettering…you can also get a lot of use out of typewritten pages and even sheet music.
Background and texture:
Another way to look at potential collage material is by texture and color. For example, you come upon a magazine ad that has a house with a yard and you LOVE the vibrant green of the grass. While you might not have an idea of how to use a photo of grass, keep the page anyway because that swatch of green grass can be used abstractly in a place where you want green (like a border, or shape, yet it has nothing to do with actual grass.
Maybe you want to make a character and you want it to have green legs. Oh, how much more interesting legs of green grass would be, yes?
So, chances are, if you like the color of the grass itself, you will be glad you saved it when you need it.

Cutting Tips:
I had a great art teacher in elementary school. So great that I remember her teaching me how to cut paper!
If you didn’t get this lesson at some point in your life, here is a tip: for precision cutting, move the paper, not the scissors. You will be amazed at how much easier your detailed cutting will be. And start deep into the blades, not at the tips.
Cutting techniques, such as moving the paper instead of the scissors, can improve precision. Various adhesives have their own benefits, from PVA glue to more specialized options like Yes! Paste and Mod Podge. The choice of surface for collage is virtually unlimited, from pre-made art boards to repurposed books.
There are some fun decorative edge craft scissors available, too. From zig zags to scalloped edges and all kinds of shapes in between.
These aren’t necessary, by any means, but they can be kind of fun.
Another option is to use an Exacto knife for those little places in which you need to get a tight cut.
And, if you want a more organic look? Tear it up! That’s right…no rules when it comes to collage art. The deckled edge that tearing leaves behind can be fun.
TIP: If you tear towards yourself you will leave a raw piece of paper border around the edge. If you tear away from yourself your image will go to the edge of your tear.
Glues and Wet Adhesives:
I could write a book on tapes and glues. In fact, I bet there is already a book out there somewhere. So, how does one decide?
If you’re new to collage I’d say just work with what you have. White school glue, glue sticks, paste, rubber cement, gel medium, tape or adhesive dot rollers, etc. You will see what you like to work with most as you go along.
Here is a recap of some of the adhesives I’ve tried:
White or Gel School Glue
Also known as Polyvinyl Acetate (PVA) glue, this one is easy because almost all of us have it on hand. Examples of this are Elemer’s Glue, carpenter’s glue (the yellow version), school glue, and book binder’s glue. There are many brands of PVA glue available at craft stores and online.
It’s flexible, strong, and usually non-acidic, if archival quality pieces are important to you. Smaller bottles have a dispenser top, but it can also be applied with a paintbrush for a more even application.
PVA glue can make thin papers buckle and bubble.
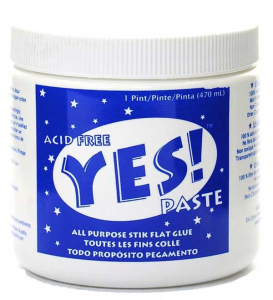
Yes! Paste
This is my current favorite. My local craft store carries it. Despite the name “paste” it is not like the old school paste you used in third grade. It’s thick yet smooth and creamy and goes on well with a brush. It has a lower moisture content than PVA glue and therefore does not buckle most papers.
Yes! Paste is acid-free and archival quality.
Glue Sticks
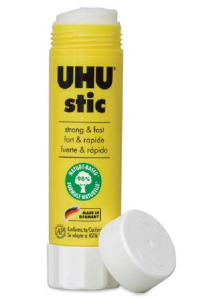
I like the Uhu and Avery brands, and the blue and purple colored ones the most because you can easily see where glue has been applied. They dry clear and both are acid-free.
Glue sticks also have a low amount of moisture and therefore don’t wrinkle average papers.
Mod Podge and Gel Medium
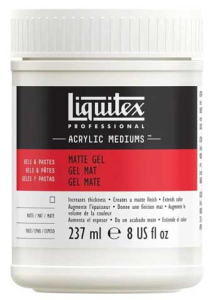
Mod Podge (for paper) and acrylic gel mediums can be used as an adhesive under papers, and also over the top as a sealer. They are acid-free and dry clear. You can find them in different finishes such as matte, satin, glossy, and more, depending on your desire.
As sealers over the top of collage pieces it can form a barrier between your paper products and applications of paints and other media and can receive layers of acrylic paint as well.
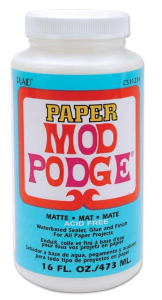
Matte gel medium is one of my favorite adhesives. Make sure you let Mod Podge and gel medium pieces have a good dry time so the pages don’t stick together. You can gently use a hair dryer or heat gun to speed the process and also put waxed paper between the pages once they are mostly dry, but not fully there.
Spray Adhesives
I don’t use spray adhesives because of the fumes, and I think it’s messy, but if this is something you are comfortable with, it’s an option to consider.
Rubber Cement
I haven’t worked with rubber cement for a long long time, but again, it’s another option if you don’t mind the smell.
Dry Connections:
Tape Applicators and Dot Rollers
Tombow double-sided tape applicators are fast and easy to use, and less messy than wet adhesives. They’re still really sticky and if you’re trying to work them right up to the edge of your paper they can still be a little messy.
They’re a fun alternative, and you can purchase refills in bulk.

Pre-loaded Tombow adhesive dot applicators are also a strong adhesive option that applies a double sided dots. They also take refill cartridges.
There are other brands of applicators that also work well.
Tapes
Tapes, tapes, tapes! So many to choose from.
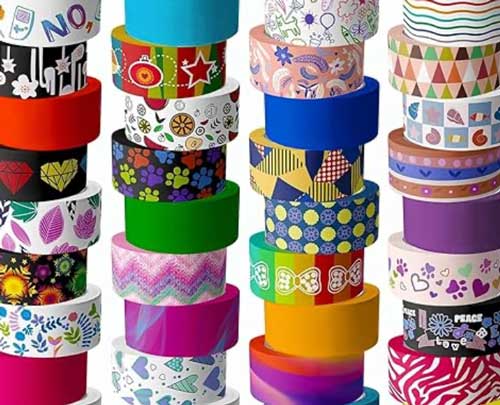
Washi tape is a favorite for it’s bright colors and patterns and the fact that it can be lifted and repositioned without damage to the paper below. It’s also strong and somewhat flexible.
I also like using colorful masking tape and painters tape, which comes in multiple colors now. Masking tape is paper based so most times it will take media like pens and paints well without beading up. It’s fast and easy and is a great reinforcing border around the edge of pages if that’s your thing, like me.
Scotch brand tape, either the matte version or shiny version. The shiny doesn’t take media like paints or pens well but you may find that you want to use it somewhere where that isn’t a consideration. I sometimes use clear packing tape as a mock lamination for covers of my journals, or portions of pages. It can also be used as a resist for painting techniques outside of your collage work.
Duct tape is a fun addition and comes in decorative patterns and colors nowadays. There is a wide variety available in craft stores. It can be used to reinforce spines of journals, covers, or pockets, or to make hinges between pages to create fold out panels of your heavier collage pieces.
Sewing and Stitching
I’ve only used sewing or stitching in my journals a little bit but I love the look. You can adhere collage pieces to pages with hand-stitching or even with your sewing machine.
Rivets
Craft stores sell decorative rivets that can be used on paper products. It’s kind of a fun touch to secure photos, or thicker pieces of material.
Surfaces and Substrates:
You can collage on anything. I just saw an example of someone collaging onto a Pringles can. I’ve seen chairs covered in collage and tables at restaurants that were collaged and then sealed with polyurethane.
You can use pre-made art boards for a surface, paper journals that you create, or repurpose old books and glue right to the pages.
If it can hold an adhesive, it can be collaged. Of course, collaging something that will be out in the elements won’t withstand weather well so, don’t expect that to last long unless you apply some type of weather-proofed sealer.
Oh No, I Made a Mistake!
Hahahaha. I’m so funny, aren’t I?
There are no mistakes, only extra under layers that give your work more depth and texture. If you don’t like something? Put something else on top of it, or paint over it and start over.
Some of my favorite journal covers have had multiple layers of collage and paint applied until I got a design I liked. I use gel medium on a lot of my covers and I love how multiple layers of collage applied in that way start to make it feel like a leather-bound volume.
Bonus Collage Help:
Make Your Collage Pieces Stand Out
Now that you’re a pro at getting all that great collage down, are you ready to make it pop?
One of the things I love about collage are the edges of pieces. It’s the perfect place to add depth and definition. You will find that different papers take different media, and some don’t take it at all, like some glossy papers.
There are so many ways to make your collaged pieces stand out, but here are a few:
Shading
Plain graphite pencil, or colored pencils are a great way to add shadowing around your collage pieces. Use the crisp edge to really get the pencil color down in there.
If pencils won’t stick to your shinier pieces of collage, fine permanent markers can also be used to crosshatch or even use different densities of tiny stapled dots to give the illusion of a shadow.
Really though, any media can be used for shading, such as acrylic paints, or even staining with coffee or tea.
The idea is to just make a faint border around the edges to draw the eye in.
Outlining
I. Love. Outlining.
It’s hard for me to not outline collage pieces in some way. Whether it’s just a black or white paint pen or marker, or making some type of other border around my collage pieces…I just can’t stop.
But outlining, either up close to the edge of your collage pieces, or a little further out with multiple outlines or border elements, serves to highlight your images and say, “Look here! This is important!”
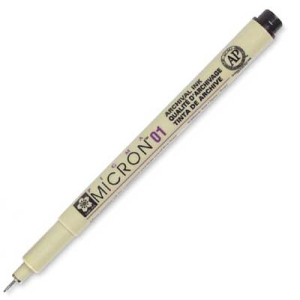
I’ve had a love affair with fine tip Micron pens for quite a while. Their delicate felt tips make the most delicious dark black, permanent lines.
Try an assortment and see which tip size you like the best. There is also a real nice brush style tip.
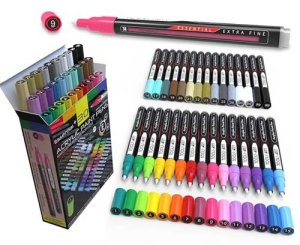
If you prefer colors other than black, acrylic paint markers are great, too. There are so many options in paint pens but I prefer the acrylics because once they dry they won’t smear if they come into contact with other wet media like paints or glues.
They go over most media too, including some of the shinier papers found in magazines.
Depth and Texture
Other ways of highlighting different parts of your collage is by getting a little more 3D. Cut out borders from your thicker collage materials and glue them down and embellish, like frames.
Glue down strings or fibers to create frames. I’ve even used beads of hot glue and carved it around favorites parts of my collage. Heck, you can glue down split peas and paint them.
Try everything! What’s the worst that could happen?
Storage and Organization
You will find as many ideas for storing your collage as there are people out there doing collage! Here are a few ideas:
File Folders
Regular old manilla file folders are easy to use, and label. For collections of smaller pieces I like to tape up the sides so the bitty parts don’t slip out. Just be sure that none of the adhesive part of the tape is exposed inside your folder or your collage will stick to it, and no one wants that!
Ziploc Baggies
Baggies are a great way to store smaller pieces too, and you can see the basic contents at a glance. I’m a little in love with binder clips and keep collections of baggies together and hang them on a peg board.
Craft Storage Drawers
This is another thing I could go a little crazy with. I have stackable plastic drawer units that I got from Walmart. I keep my larger pieces in these drawers.
Sort by Theme, Color, Weight of Material
I like to sort my collage by elements that I work with a lot. I have folders for face parts, body parts, flowers, lettering, etc.
I have folders and baggies with areas of color cut out (like my green grass example above) and I have folders for images of just windows, doors, and buildings.
You will find what your recurring themes are and you’ll find what organization works best for you. And…once you get that, you may even decide to try it a different way. Or, you’ll just throw it all into a bin and dig around in it every time you sit down to work.
I have plenty of bins with magazines, and shelves with picture books. I have a box with old decorative shopping bags and discarded wrapping papers and greeting cards.
Organizing is a really personal process so everyone will do this part differently, for sure. I’d love to see what you come up with.
From materials to adhesives to techniques and storage, there is so much to the world of collaging. The resources I’ve shared are still just the start of a collaging journey, and I still learn new things every day.
If you’d like more information or help about how I use collage in my art journaling, be sure to grab my Free Jumble Journal Roadmap.
